Showing posts with label Section 21 - Mid-fuse ribs & bottom skins. Show all posts

Saturday, March 25, 2017

Stabilator / Steps / Fuses / Pitot tube

Started today with several misc. items. With the help of S & N I was able to re-attached the stabilator. I then installed the steps and the fuses. The replacement fuses were then placed in a block on the back of the map box door.

I then started section 47 - Spinner & Propeller. The pitot tube was prepared with the pitot block as per plans. This involved making a slight dimple (or drilled indentation) in the pitot tube. The block and pitot tube were then installed. The pitot tubes were then attached with safety wire. I prepared the spinner by trimming and sanding to the time line. The bushing was then placed in the spinner. I used superglue for this step.  The spinner plate and hub mount half was then installed. Bolts were torqued as per specified with the propeller.

Time: 3.5 hrs

Stabilator Re-attached

Step

Fuses placed

Fuse replacements

Pitot Block
Pitot Tube


Pitot Tube attached
Spinner

Spinner Plate and Hub mount Half


Thursday, November 3, 2016

Paint step & Fuel vent

Well I have a little time to kill until I pick up the avionics and power plant kits so I decided to do some misc painting and painted the steps and fuel vent line.

The shop was looking pretty messy with tools everywhere, so I did a little shop clean up. We will see if I can keep it a little more straightened up during the rest of the build, but you know how that sometimes goes.

Time: 1 hr.

Painted steps

Painted fuel vent

Clean shop


Friday, October 30, 2015

Upper firewall / misc.

Worked on several different areas today.  Picked up some tubing to attached the fuel lines for pressure testing.  I prepared the side stiffeners and clecoed them in place.  The map box interior was then painted with Rustoleum Black hammered.

Then it was fuel sealant time. I placed some fuel sealant in the opening of the step. With the help of N and T we sealed and riveted the upper firewall.  Fuel sealant was then placed around the perimeter of the firewall as per plans.

Time: 3.25 hrs.

Hose line connecting fuel lines for pressure test

Side stiffeners

Spray paint map box interior

Upper Firewall

Sealed steps

Cowl hing

Sealed upper firewall

Sealed perimeter upper firewall

Sealed perimeter lower firewall

Sealed perimeter lower firewall


Sunday, October 4, 2015

Roll bar / misc

Several miscellaneous items completed today. I first started with assembly of the rollbar with attaching the latch plate.  It calls for match drilling #43 the hole in the latch plate. I did not have a #43 bit so I used a 5/64th bit that is a little smaller. The holes in the roll bar were then enlarged to #30.  The plans call for using a #4-40 tap to tap the hole in the latch plate. I did not have one of those either, so that will have to wait until I order one. T and B helped me rivet the rollbar together.  I then prepared the rollbar braces and the baggage bulkhead.  Trying to get as much ready as I can so once the longerons are complete we can move forward.

I went back through the plans to do some "catchup" of items that I saw needed worked on. Once was the holes for the steps. They were a little tight so I opened them up some to allow the step to insert correctly. I will be waiting until later in the build to permanently install the step.

I had also noticed the hole in the light extensions to be too small for the wiring so I enlarged them some.

I then started on preparing the parts for the vents.  I will assemble them later after the longeron is complete and while working on the side skins.

Time: 3 hrs

Latch plate riveted to rollbar


Riveting roll bar

Completed rollbar

Support frames and bracket

Baggage bulkheads

Step hole tight

Step trial fit

Light opening enlarged

Vents prepared


Saturday, September 26, 2015

Forward lower fuselage complete

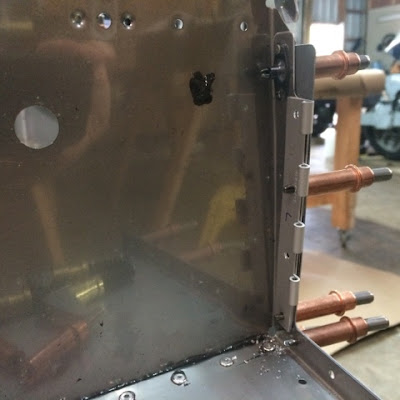
The forward lower fuselage was completed today with the help of N and B.  We started by attaching the pedal support channels and nutplates to the firewall shelf.  With extra hands we went back to section 21 to install the system block studs. We had tried to install before, but ended up breaking a stud. I ordered a new wrench and they installed without any problem.

 We then had our first time using fuel tank sealant to install the firewall shelf.  I mixed a little by hand and placed in a syringe. It wasn't as bad as I thought it would be.  The shelf was installed without problem.

The bracket that attaches on the tunnel rib was then prepared, primed and installed.  The diagonal brace was installed on the firewall bottom.  The forward lower fuselage was then attached to the remaining fuselage.

Time: 2.75 hrs

Rudder Pedal support channels

System Block Studs

Firewall shelf

Fuel tank sealant under shelf

Bracket on tunnel rib

Diagonal Brace

Prime

Attaching forward lower fuselage

Current state of fuselage

Interior view


Monday, September 7, 2015

Step floor / baggage bulkhead.

Had the help of B today.  We riveted the step floor and baggage bulkhead. During these steps part of the autopilot brackets were installed.

Time: 1.25   hrs.

Riveting step floor

Riveting baggage bulkhead

Clecoing autopilot brackets

Auto pilot brackets

Facet pump bracket


Friday, September 4, 2015

Step attach angle install

The step attach angles were installed along with the bulkhead. Instructions state that the steps can be added at any time during the install, so I have elected to wait until later in the build.  Bushings were placed.

Time: 1 hr.

Riveting step attach angles

Riveting bulkhead

Interior view after riveting step attach angles.


Thursday, September 3, 2015

Step angle bracket / step floor nutplate a

 Worked today on the step attach angles. It involved cutting and match drilling the step attach angles and leveling the step to match drill the hole for the step.  The angles required priming, so while the primer was setting I moved forward and attached nutplate to the step floor and the baggage bulkhead.

Time: 1.5 hrs

Match drilling step attach angles.

Match drilling step hole

Priming step attach angles

Nutplates on Step floor

Nutplates on step floor

Nutplates on baggage bulkhead