Showing posts with label Wings. Show all posts

Tuesday, April 18, 2017

Move Wings

We got another break in the weather so I moved the wings over with the help of S. I also took over some work tables and other tool and supplies.  We installed the wings without to much issue. Looking forward to more "HANGAR" time as I get the plane ready for inspection and first flight.

Time: 1.5 hrs

Moving wings to hangar
Wings installed


Wings installed

The plane and I

Plane in hangar

View from hangar


Monday, April 17, 2017

Wing light extensions

Worked on the wing light extensions. Started by clecoing the extension then adding electrical tape around the lower edge. Fuel sealant was then place under the lower edge and then the extension riveted as per plans.  I also loaded and secure the work benches and got all the other supplies and tools ready to go to the hangar.

Time: 2 hrs

Taping around wing extensions

Fuel sealant added

Work benches loaded


Saturday, April 15, 2017

MOVING DAY!!!!!!

Today was the big day. MOVING DAY!!!!!!  The weather finally cooperated so the roads would be dry to get the plane to the hangar. I had the help of 3 of my kids. Everything went smoothly.  We got it unloaded and put into my hangar, just in time for one of my boys soccer game.

After we arrived back home I worked on trimming the wing skins to allow room for the seal. The wings were then loaded onto the trailer. Once we get some nice weather again they will be taken to the hangar.

Time: 2.5 hrs

Ready to leave shop

Backing into hangar

Unloading

B and plane

RV12 in hangar

Plane and I

My helping hands

Wing skin trim

Wings loaded onto trailer


Thursday, June 25, 2015

Light extension brackets/ wiring

 After a couple weeks of being out of town it was time to get back to the RV12 project.  My wife will be picking up the Fuselage kit from Vans tomorrow so I need to finish as much as I can on the lighting kit today.  The light extensions were drilled for the light brackets and the holes made for the wiring. The light brackets were then attached.  The wiring was completed by adding molex connectors and housings to the wires in the wing and the wires on the light. I will connect them together at a later time.  I will also wait to rivet the light extensions until later as it calls for fuel tank sealant to be used around the edges. I will do it together later when other parts need the sealant also.

Time: 1.75 hrs.

Light extensions drilled and hole made for wiring.

Ligh Bracket attached to light extension

Molex connector attached to wiring.

Molex connector attached to light wiring.


Monday, June 8, 2015

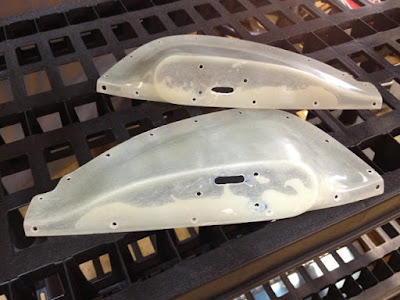
Light extension clay removal

 I had a few minutes to remove the clay in the wing light extension and shape out the resin around where a future nut will be.

Time: 0.25 hrs.

Wing extensions after removal from wing. Clay still present.

Friday, June 5, 2015

Light extension

Worked on light extensions today. First trimmed the extensions to scribed line. The extensions were then clecoed to the wings and the holes drilled.  I then applied car wax to the wing in preparation for adding the filler resin on the extension. The resin was then mixed, added to the wing extensions and then clecoed to the wing.

Time: 2.25 hrs.

Light Extensions Trimmed

Drilling light extensions

Light Extension Clecoes

Light extensions

Waxing for light extensions resin

Resin in light extension

Light extensions filled with resin

Light extension filled with resin


Friday, May 29, 2015

Flaperons completed

Started the day off by attaching the nose skins. The rod-end bearings were then placed with loctite 243 and screwed in per measurement on plans. This completes the wing kit. The fuselage kit will be ready at the end of June, so that gives me a little time to work on the wing tip lights and other projects around the house.

Time: 1.75 hrs.

Flaperon nose skins

Installing rod end bearings

Rod end bearing installed

Flaperons complete


Thursday, May 28, 2015

Flaperons continued

A good portion of the flaperons were assembled today. The plan called out for fabricating actuation brackets and pivot brackets, but lucky me it looks like Vans has had those pre-fabricated. What a time saver! The small flaperon parts were primed and then I assembled the flaperon skeletons.   The aft skins were then attached. The plans call for making sure the skins lay flat against the main ribs, which at first they appeared to lay flat. After riveting the skins it does look like there is a little bow outward of the skins between the main ribs. This will be something I will have to look at in the future to see if they will need to be adjusted by squeezing in on the trailing edge. For now we will leave as is.

Time: 5 hrs.

Inboard nose rib

Priming of small flaperon parts

Flaperon skeleton complete

Aft skins clecoed

Aft skins riveted


Tuesday, May 26, 2015

Right wing finish / start flaperons

Great accomplishment today getting the right wing completed (minus the tip lighting). Started out attaching the handle and top skins. The hole was cut in the tip closeout for the lighting. The closeout was riveted and the right wing was placed in the cradle with the left wing. Don't they look great together!  I have ordered some epoxy that will be needed to install the wing tip lights, so that will have to wait for another day.

Then on to the flaperons. The counterbalance was match drilled and attached to the nose ribs. The outbd nose skin was clecoed and the counterbalance was match drilled.

Time: 3.5 hrs

Right Wing Tip Top Skins

Right wing Tip Top skins
Marking hole for lighting

Wings complete and in cradle
Flaperon counterbalance

Flaperon counterbalance

Match drilling outbd nose skin


Friday, May 22, 2015

Landing light finish/ R. Wing top skin

Good progress was made today on the right wing. I had the help of T and N at times during the day. We first installed the landing light. That was a little tricky. We had to pay close attention to the instructions as the bolt to use is not the bolt the comes with the light. Took me a few minutes to figure that one out. Getting the landing light bolted in was also a little tricky. I can see how it would definitely be a difficult task if done after the wings were completed. It is not something that I want to have to mess with much in the future.  While installing one of the wires came loose from the molex connecter. I replaced the connector and decided to place some electrical tape in a few places to assure that the likelihood of disconnection would be reduced. We then tried in the landing light cover. It fit nicely. I took it off for now as I do not want to worry about it getting damaged during the rest of the construction process. I will install it towards the end before getting ready for first flight.

After the landing light was installed we then worked on the upper wing skins. With 3 sets of hands all 3 upper skins and the doubler was able to be installed.

Time: 3.5 hrs

Landing light isntalled

Landing light inside view
T and N working on top skins

Top skins complete.