Time: 3.75 hrs
This is a log of the build of a Vans RV-12, kit #120895. This will be my first experience in aircraft construction and I hope to learn a lot along the way.
Saturday, June 11, 2016
Canopy drilling
Well, today was the big day of drilling the canopy. With the help of N. we were able to get it all drilled. We started by drilling the holes in the front and rear. Then match drilling the canopy skirt to the canopy frame. The holes were then match drilled from the canopy skirt to the canopy. N. sat inside to help push against the canopy while the holes were drilled. There was some minor sanding that had to be done to the canopy on the left side to get the proper fit.
Time: 3.75 hrs
Time: 3.75 hrs
Friday, June 10, 2016
Fuel tank leak repair / canopy cont.
I received some carbon paper and marked on the canopy bar where the canopy touched the bar. The canopy was then removed and holes drilled in the bar as per plans.
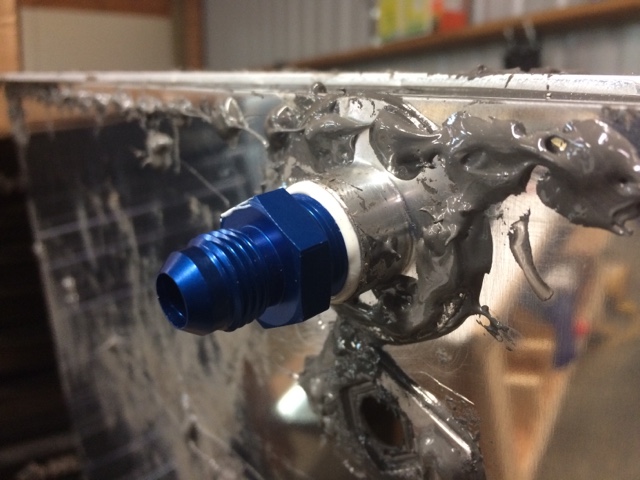
I then cleaned and placed some fuel sealant on the area of the small leak of the fuel tank. I was small enough and at an upper corner that won't get much pressure so I figured at this point placing sealant on the outside should suffice. If not I will have to go in from the inside, which would be more of a project. While I had sealant out I decided to go around some of the seams and add a little more sealant. Probably not necessary, but since I had sealant mixed up I figured it wouldn't hurt. I will wait another week before I test the fuel tank again.
I then fabricated the canopy blocks and handles.
Time: 1.75 hrs.
I then cleaned and placed some fuel sealant on the area of the small leak of the fuel tank. I was small enough and at an upper corner that won't get much pressure so I figured at this point placing sealant on the outside should suffice. If not I will have to go in from the inside, which would be more of a project. While I had sealant out I decided to go around some of the seams and add a little more sealant. Probably not necessary, but since I had sealant mixed up I figured it wouldn't hurt. I will wait another week before I test the fuel tank again.
I then fabricated the canopy blocks and handles.
Time: 1.75 hrs.
Wednesday, May 25, 2016
Fuel tank test / latch handle
After waiting over a week for the fuel tank sealant to cure good I pressure tested the tank. As instructed a balloon was placed. I let it set there for a bit to see if it changed. While I was waiting I fabricated the latch handle. I then checked the balloon and it had gone down some. I made a mixture of soap water and sprayed on all the seams. There was one small leak noticed on the UR rear corner. All the other seams seemed to be good.
Time: 1 hr.
Time: 1 hr.
Thursday, May 12, 2016
Canopy fitting
Today was the big day of getting the canopy out of the box. We worked at fitting it onto the frame and checking all measurements as per plans. The hole drilled for the latch handle tube seemed a little off. (A few days later after reading some posts from others, if I made sure the blocks were contacting all the way up and down on the frame then the hole seemed to line up better.) I had the back window on originally, but it seemed to interfere some. I will most likely have to trim either the back of the canopy or the front of the rear window. We will see.
Time: 1.25 hrs
Time: 1.25 hrs
![]() |
| Add caption |
![]() |
| Add caption |
Wednesday, May 11, 2016
Sender plate / fuel vent line
Installed the sender plate and tested connectivity. The fuel vent bracket was then installed and the vent lines fabricated. I then installed the snap bushing and rivet for the vent lines.
Time: 1.75 hrs
Time: 1.75 hrs
![]() |
| Sender plate |
![]() |
| Fuel vent line bracket |
![]() |
| Fuel cent line bracket |
![]() |
| Fuel vent line |
![]() |
| Vent rivet and snap bushing |
Saturday, May 7, 2016
Fuel tank neck / canopy attach angles
Temporarily installed the fuel tank so I could adjust and match drill the fuel neck. The nutplates were then installed in the flange. The fuel return line was cut, bent and installed. Then the top skin was riveted in place.
I then fluted, match-drilled and installed the canopy attach angles. I noticed that the cardboard I had originally on the sides was a little too thick so I replaced them with one that was 1/8 inch. I also had to slightly bend the canopy bow to get the proper measurement between it and the instrument panel.
Time: 3 hrs
I then fluted, match-drilled and installed the canopy attach angles. I noticed that the cardboard I had originally on the sides was a little too thick so I replaced them with one that was 1/8 inch. I also had to slightly bend the canopy bow to get the proper measurement between it and the instrument panel.
Time: 3 hrs
Thursday, May 5, 2016
Fuel tank cont.
Continued work on the fuel tank. I installed the fuel strainer. The fuel sender wire was bent per plans and the tested. I received a reading of 30 in the up position and 247 in the down position (The plans say approximately 30 in one position and 240 in the other). The fuel sender was temporarily installed to make sure the float is at the proper measurements. The mechanical gauge was installed. The neck flange and the fluid fitting were also installed.
Time: 2 hrs
Time: 2 hrs
Subscribe to:
Posts (Atom)