Thursday, March 30, 2017

Repaint Roll Bar

I spent some time today repainting the roll bar. The reason for this is that the paint on the roll bar seemed to be easily removed by masking tape. So I started by removing the paint, sanding the roll bar, and then applying a rustoleum primer and then the rustoleum paint. This took some short work sessions over several hours. My hope is that the different primer will adhere the paint better.  The metal of the roll bar is a different metal than the rest of the plane. Looking back I probably should have had the roll bar powder coated.

Time: 1.25 hrs.

Rollbar primed

Wednesday, March 29, 2017

Spinner / Tail Fairing

I finished the propeller section by installing the spinner. I then worked on fitting the tail fairing and adjusting for any interference. It was a little tight in areas of the trim rod so the fairing was adjusted slightly with a file. I checked with the trim tab in both the extended and retracted positions.

Time: 2 hrs.

Spinner installed

Tailcone fairing installed


Tuesday, March 28, 2017

Propeller

The propeller blades were put on today. The spinner was put into position and clamped. The lower spark plugs were removed and the propeller and spinner was rotated to be able to center the spinner. Once centered the spinner was match drilled to the spinner plates.  The spinner and propeller were then removed. A gap filler was then fabricated per plans and riveted to spinner plate. Nutplates were installed on the spinner plates. The propeller was then reinstalled and the blades pitched as per plans. I came quite close between the two blades.

Time: 5 hrs.

Propeller installed

Spinner placed 

Aligning of spinner

Spinner match drilled

Gap filler fabricated

Nutplates attached

Gap filler riveted

1st blade pitch

2nd blade pitch


Saturday, March 25, 2017

Stabilator / Steps / Fuses / Pitot tube

Started today with several misc. items. With the help of S & N I was able to re-attached the stabilator. I then installed the steps and the fuses. The replacement fuses were then placed in a block on the back of the map box door.

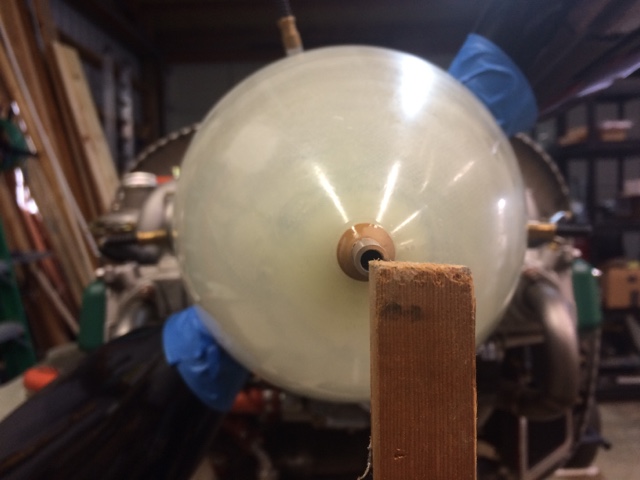
I then started section 47 - Spinner & Propeller. The pitot tube was prepared with the pitot block as per plans. This involved making a slight dimple (or drilled indentation) in the pitot tube. The block and pitot tube were then installed. The pitot tubes were then attached with safety wire. I prepared the spinner by trimming and sanding to the time line. The bushing was then placed in the spinner. I used superglue for this step.  The spinner plate and hub mount half was then installed. Bolts were torqued as per specified with the propeller.

Time: 3.5 hrs

Stabilator Re-attached

Step

Fuses placed

Fuse replacements

Pitot Block
Pitot Tube


Pitot Tube attached
Spinner

Spinner Plate and Hub mount Half


Friday, March 24, 2017

Heat Shield / Engine Controls

I placed the heat shield in the lower cowl. This involved creating a template from newspaper and verifying proper placement with exhaust pipes. The shield was then cut to template and attached to cowl. Resin was then placed on the edges.

I then started and finished section 50 - Engine Controls. The throttle and choke cables were installed as per plans. The longer cables going to the right. They were attached to the carburetor as per plans. I then fuse the end of the cables using a flame and drill as instructed with an EAA video. It worked quite well.

Time: 4hrs

Heat Shield

Engine Controls

Control Cables

Right Carb.

Left carb

Rigth cables attached

Control cables


Thursday, March 23, 2017

Oil Hoses

After over a month of not working on the plane due to a trip to Guatemala and other things, I was able to get back out to the shop.  I started today by removing the clecoes and filling in the hole where the cowling duct was attached. I had a little trouble taking off the left cowl pin that attaches the upper cowl to the lower cowl. For some reason resin had seeped into the hinge.  After a bit of work I was able to get the pin removed. I then took a long #40 drill and cleaned out the hinge openings until the pin could slide freely again.  The cooling duct seal was placed with RTV sealant.

I then routed and attached the oil hoses as per plans.

Time: 2 hrs

Cowl Duct Seal

Oil Hoses

Oil Hose

Oil Hose


Saturday, February 11, 2017

Cooling Duct Epoxy

Fiberglass time again today. I started by placing the duct interface on the cooling duct with epoxy. The cooling duct was then placed on the bottom cowl with epoxy and clecoed. Strips of fiberglass were then placed as per plans inside the cooling duct interface and front portion of the cooling duct above the oil cooler. The bottom and top cowls were then put in place and now we will wait for the epoxy to set.

Time: 1.5 hrs

Fiberglass Cooling Duct Interface

Fiberglass cooling duct

Cooling duct in place for set

Top cowl in place while epoxy sets.