Time: 4.75 hrs.
This is a log of the build of a Vans RV-12, kit #120895. This will be my first experience in aircraft construction and I hope to learn a lot along the way.
Saturday, January 30, 2016
Control stick pushrods
I spent a few minutes finishing up the wiring on the control stick then with the help of N we were able to get some of the flight controls done. We placed the flap handle and flap mixer bellcranks. The control stick pushrods were then fabricated and installed. The flaperon pushrods were next. We then cut apart and prepared the pieces for the detent bracket and the flap handle tube and fork.
Time: 4.75 hrs.
Time: 4.75 hrs.
Thursday, January 21, 2016
Control stick wiring
I worked quite a bit today on the control sticks, but before starting with them I finished up the right side wing electrical bracket and plate.
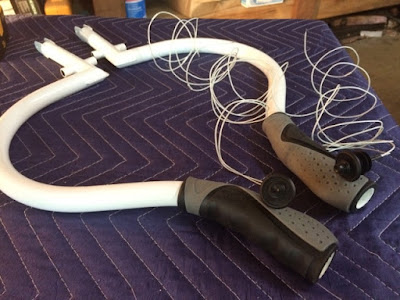
I had ordered a few different hand grips, but none of them seemed to work right or fit. I made a little trip to our local Bi-mart as we don't have a bike shop close by. Bi-mart just happened to have some grips that might work. I purchased them, brought them home, and put them on the sticks. They don't look too bad. Then the part of drilling the end cap for the PTT came. The end caps that came with the grips had some issues when drilling as by the time the hole was big enough for the PTT all the retention of the end caps was gone. Thinking I would have to buy another set, I remembered the ones I had already bought and ended up using a set of the those end caps. The PTT was placed on the end caps. Then I spent a challenging 2 hours trying to get the wires through the stick. Not an easy process. The first one look quite a bit longer than the second. I don't know if the second one was easier or if I just figured out how to get it done.
The sticks were then placed into position and the ground wires were finished. I am short on a few of the spade connectors, so I will need to order some to finish this part of the plans.
Time: 4 hrs.
Saturday, January 16, 2016
More wiring
More wiring work today. Most wires have been ran, so it was time to tidy things up. I installed the wireways near the pedal bar and then went through securing wires with tie wraps. System blocks were installed. The noise filter near the fuel pump was tie wrapped and RTV sealant was place underneath as per plans. I then worked on tie wrapping and installing the left wing electrical bracket and cover plate.
Time: 2.75 hrs
Time: 2.75 hrs
Thursday, January 14, 2016
Wheel balance / wiring
Started the today's build session by balancing the nose wheel. I had purchased a balancer, but it will only work for the nose wheel and not the main wheels since the main wheels have a larger axle. There is probably way to make it work, but the nose wheel I think is more critical to have balanced. I know many people do not even do this step. I did have to add 1.25 oz of weight near the stem to get the wheel balanced. Once balanced I installed it back on the nose gear.
I then went back to the wiring. I ran the wires and tubes from the tailcone section per planes. I put together the fuselage wiring harnesses in the panel and also in the tailcone section.
Time: 2.75 hrs.
I then went back to the wiring. I ran the wires and tubes from the tailcone section per planes. I put together the fuselage wiring harnesses in the panel and also in the tailcone section.
Time: 2.75 hrs.
Friday, January 1, 2016
Tailcone attach
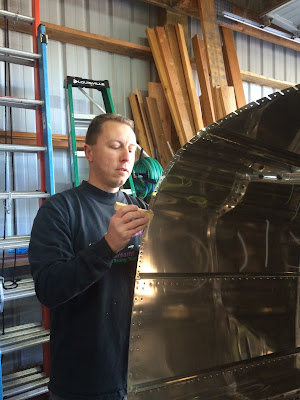
Another big milestone in the build. With help of S, N, and T we were able to get the tailcone attached. We had to do a little shop shuffle moving things around so we would have room for the tailcone to be attached to the fuselage. We brought the tailcone into position. We had to peel back a little of the blue plastic in order to fit properly. The upper tabs were bent and then the tailcone aligned into place. It took a little maneuvering to get into to go into place properly, but we made it work. The plans called for just the tailcone without feathers for this process, but since I already had the VS and stabilator installed, I didn't want to remove them.
We clecoed the tailcone and then riveted it along with the corner side skins. T worked on getting the plastic off the tailcone. It is a little tail heavy right now, but starting to really look like a plane.
Time: 3.25 hrs
We clecoed the tailcone and then riveted it along with the corner side skins. T worked on getting the plastic off the tailcone. It is a little tail heavy right now, but starting to really look like a plane.
Time: 3.25 hrs
 |
| Moving tail section |
 |
| Tailcone brought into place |
 |
| Tailcone brought into place |
 |
| Peeling back blue plastic |
 |
| Bending tab |
 |
| Fuselage |
 |
| Tailcone |
 |
| Clecoing tailcone to fuselage |
 |
| Clecoing tailcone |
 |
| Clecoing tailcone |
 |
| Riveting tailcone |
 |
| Removing plastic |
 |
| Tailcone attached |
Subscribe to:
Comments (Atom)


