Time: 1.75 hrs.
This is a log of the build of a Vans RV-12, kit #120895. This will be my first experience in aircraft construction and I hope to learn a lot along the way.
Thursday, June 25, 2015
Light extension brackets/ wiring
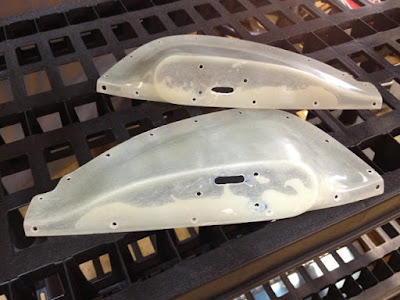
After a couple weeks of being out of town it was time to get back to the RV12 project. My wife will be picking up the Fuselage kit from Vans tomorrow so I need to finish as much as I can on the lighting kit today. The light extensions were drilled for the light brackets and the holes made for the wiring. The light brackets were then attached. The wiring was completed by adding molex connectors and housings to the wires in the wing and the wires on the light. I will connect them together at a later time. I will also wait to rivet the light extensions until later as it calls for fuel tank sealant to be used around the edges. I will do it together later when other parts need the sealant also.
Time: 1.75 hrs.
Time: 1.75 hrs.
Monday, June 8, 2015
Light extension clay removal
I had a few minutes to remove the clay in the wing light extension and shape out the resin around where a future nut will be.
Time: 0.25 hrs.
Time: 0.25 hrs.
Friday, June 5, 2015
Light extension
Worked on light extensions today. First trimmed the extensions to scribed line. The extensions were then clecoed to the wings and the holes drilled. I then applied car wax to the wing in preparation for adding the filler resin on the extension. The resin was then mixed, added to the wing extensions and then clecoed to the wing.
Time: 2.25 hrs.
Time: 2.25 hrs.
 |
| Light Extensions Trimmed |
 |
| Drilling light extensions |
 |
| Light Extension Clecoes |
 |
| Light extensions |
 |
| Waxing for light extensions resin |
 |
| Resin in light extension |
 |
| Light extensions filled with resin |
 |
| Light extension filled with resin |
Subscribe to:
Comments (Atom)


