Saturday, February 14, 2015

Empennage attachment

Well it has been a rough day on the RV12 build.  T and N helped me today. First we spent an hour this morning building a tail cone cradle.  It turned out pretty good. We then attached the VS and rudder to the tail cone. That went fairly smoothly.  We then spend about 2 hours attaching the stabilator to the tail cone.  We previous had super glued washers onto the hinge bracket as per instructions, but the fit was tight on the outside, so the washers broke loose.  It is a very hard area to get to.  We super glued the washers again and after several attempts we were able to get the stabilator attached.

N and I then worked on getting the AST assemblies attached. N noticed that there was blue pastic still in the AST assemblies. OOPS!!!  Don't know how that happened.  We then spend about an hour removing rivets, disassembling, removing plastic and reassembling the AST assemblies. We then tried attaching them to the stabilator. We quickly noticed that the right side assembly did not align up right at the hinges. We could tighly get it to fit, but I felt that it was not good to leave it that way.  I am going to discuss things with Vans and see how we can correct the problem.  I may need to make a whole new AST assembly.

Time: 5 hrs

Tail Cone Cradle

Attaching Rudder

Installing washer for stabilator

Stabilator attachment

Stabilator attached

Hinge area

Blue plastic inside AST assembly. OOPS!!!

Misalignment of right side AST Hinge

Right and left side AST Hinges not even.


Friday, February 13, 2015

Tail cone complete

Tail cone was completed today. T and I started by completing the rivets on the side skins. N and I then later place the top skin on along with the forward skin rib.  Everything was clecoed then riveted. I was having him help me because the rest of the family was having a surprise birthday party for him and friends were coming over.  I told him mom needed some help in the house for a minute so we went inside and "surprise".  Several of his friends wanted to see the plane and several were able to pop a few rivets.  They seemed to enjoy that.

I then spent a little time working on the small pieces in section 11 for the trim tab motor assembly.  They were cut, deburred, and I primed them.

Time:  2.5 hrs


Thursday, February 12, 2015

Tail cone assembly

Quite a bit was accomplished on the tail cone today.  We started by test fitting the skid plate to the stabilator to verify washer sizes needed. It was a little tricky because of the tight space to work in.  We superglue the washers to the hinge brackets. Shear clips were then attached to the j stiffeners.  We then worked on attached the bottom skins to the frames. The lower skins were then clecoed to the frames and bottom skins.  Per instructions they were supported by saw horses, but I determined that blocks were needed to elevate and create clearance for the lower skins to be attached propertly.  After the bottom and lower skins were riveted we then turned the tail cone upright. Side skins were then attached and clecoed. We placed the static source rivets and ran the tubing for the static system.  B and T helped rivet the side skins.  We were able to get half of the rivets placed on the right side before we ran out of time.  Beginning to look like an airplane more every day.

Time: 5.5 hrs.

Testing fit of Skid plate to Stabilator

Attaching Shear clips to J stiffeners

Attaching frames to left and right skins

Bottom skins clecoed and ready for riveting

Blocks added for support while attaching Lower skins
Bottom and lower skins cleced and ready for riveting

Alternating holes were clecoed and rivets place in open holes.

T riveting bottom skins

Frames and bottom and lower skins attached

Static source rivet

Static source attached

Stabilator control string and WH-P30 Trim Wire placed

B and T riveting side skins

B placing Clecos

One side halfway riveted

View inside cone


Friday, February 6, 2015

Skid plate

Started today preparing the parts of the skid plate by cutting and deburring as per instructions. The tail skid bracket was fabricated and hole tapped as required. The skid plate was then assembled as per instructions. Several different rivets were used, so careful attention was required to make sure the proper rivet went in the proper place.

We attempted to fit the skid plate to the stabilator. It was difficult getting the washers in place and ran out of time, so that will have to wait until the next time.

Time: 3.25 hrs

Tapping of skid plate bracket

Attach brackets

Skid plate aft

Skid plate front

Skid plate aft


Thursday, February 5, 2015

Saw horses, Tail cone skin prep

Spent 1 hour today cutting and putting together a couple saw horses in preparation for tail cone assembly.  S and T helped me for a while today preparing the tail cone skins. We removed the plastic around the rivet areas and deburred the edges.  A few of them required placing a slight bend on the edges as per instructions. This was easily accomplished with a bending tool. This will allow for a tighter fit of the the edges of the skins when they are attached together.

We then started putting together the tail cone frames.

Priming Note:  At this point I have decided to not prime the tail cone as this section is easily accessible and instead of priming I may apply a solution such as corrosion x for corrosion resistance. The tail cone section and wings will be easier to apply in than the smaller sections built so far. Many do not prime their aircraft at all and have had no issues with corrosion.

Time: 4.5 hrs

Sawhorses

Tailcone Skin Prep

Fuselage Frames

Fuselage Frame

Plate and angle on 1210 Frame


Wednesday, February 4, 2015

FAA registration number reserved!

Just received confirmation in the mail today of the reservation of N number "N8697T" that we plan on using for this RV12 when we have it completed. Now we just need to finish the plane. 

Monday, February 2, 2015

Stabilator aft skins, hinges, counterbalance

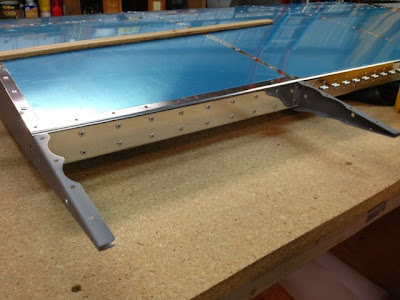
I had some good help from B today in finishing the stabilator.  We began by match drilling the skin splice plate.  We then riveted the aft hinges to the stabilator. The aft skins and ribs were then riveted. I rolled the forward edge of the aft skins to have tight contact with the forward skin.  We then installed the upper and lower horns.  We finished it off by attaching the weights to the counterbalance arm.  We tried it in the stabilator and then removed it for better storage until we start putting all the sub components together. 

Time: 2 hrs

Attaching aft hinges to stabilator

Ribs for Aft skin

Aft skin attached

Horns being attached 

Counterbalance weights added